ROASTED FLAVORS

Where bold flavors meet everyday meals. Warm, vibrant, and made to share. 🔥🥗🍴

NEW RECIPES

- 1 lb (450g) chicken breast - 1/2 cup cornstarch - 1/4 cup fresh orange juice - Zest of 1 orange For this dish, chicken breast serves as the main protein. Cut it into bite-sized pieces for easy cooking and eating. Cornstarch coats the chicken, giving it a crispy texture when air-fried. Fresh orange juice and zest add a bright, citrusy flavor that makes this dish special. - 1/2 teaspoon salt - 1/2 teaspoon black pepper - 1 teaspoon garlic powder - 1 teaspoon paprika Seasonings enhance the chicken's flavor. Salt and black pepper bring out the natural taste of the chicken. Garlic powder adds a savory note, while paprika gives a hint of smokiness. Together, they create a well-rounded flavor profile. - 2 tablespoons honey - 1 tablespoon low-sodium soy sauce - 1 tablespoon rice vinegar - 1 teaspoon freshly grated ginger The sauce is the star of the dish. Honey adds sweetness, balancing the tang of the soy sauce. Low-sodium soy sauce keeps the dish lighter. Rice vinegar adds acidity, and ginger gives a warm spice. Together, these ingredients form a delicious sauce that coats the chicken perfectly. {{ingredient_image_2}} Coating the chicken bites Start by mixing 1/2 cup cornstarch, 1/2 teaspoon salt, 1/2 teaspoon black pepper, 1 teaspoon garlic powder, and 1 teaspoon paprika in a large bowl. This mix gives the chicken its crispy coat. In another bowl, whisk 1 large egg until smooth. Take each chicken piece, dip it in the egg, and then roll it in the cornstarch mix. Make sure every piece is covered well. This step is key for that crunch you want. Prepping the air fryer Set your air fryer to 375°F (190°C). Let it preheat for about 5 minutes. Preheating helps the chicken cook evenly and get crispy. This small step makes a big difference in the final dish. Arranging chicken in the fryer Place your coated chicken bites in the air fryer basket. Make sure they are in a single layer. If you have too many pieces, cook in batches. Overcrowding can lead to uneven cooking. Cooking time and shaking Air fry the chicken for 12 to 15 minutes. Halfway through, shake the basket gently. This helps all sides get that golden brown color. The chicken is ready when it looks crispy and delicious. Mixing the sauce ingredients While the chicken cooks, you can make the orange sauce. In a small saucepan, mix 1/4 cup fresh orange juice, the zest of one orange, 2 tablespoons honey, 1 tablespoon low-sodium soy sauce, 1 tablespoon rice vinegar, and 1 teaspoon freshly grated ginger. This mix creates a bright and tangy sauce. Cooking and thickening Heat the saucepan over medium heat. Stir the sauce often and let it simmer for about 3 to 5 minutes. The sauce should thicken slightly and smell amazing. This step adds flavor to your chicken bites. Once the chicken is done, combine it with the orange sauce. Toss the chicken until every piece is covered. Enjoy your crispy air fryer orange chicken bites! To get that perfect crisp on your orange chicken bites, preheat your air fryer to 375°F (190°C) for about 5 minutes. This step ensures even cooking. If you skip this, your chicken may not turn out as crispy. Avoid overcrowding the air fryer basket. Place the chicken pieces in a single layer. If you have a lot of chicken, fry it in batches. This allows hot air to circulate around each piece, giving you that golden brown finish. You can boost the flavor of your orange chicken bites by adding spices. Try cayenne pepper for heat or onion powder for depth. These simple additions can make a big difference. If you want a different sweetness, consider using maple syrup or agave nectar instead of honey. This change can alter the taste profile and still keep it yummy. When serving your orange chicken bites, pair them with tasty side dishes. Steamed rice or a fresh salad works well. Both options balance the meal nicely. For garnishing, sprinkle some chopped green onions and sesame seeds on top. This adds color and a nice crunch. You can also serve with a citrus wedge for extra zing! Pro Tips Use Fresh Ingredients: Fresh orange juice and zest will elevate the flavor of your sauce significantly compared to bottled alternatives. Don't Overcrowd the Air Fryer: Air frying in batches allows for better air circulation, ensuring each piece of chicken gets that perfect crispiness. Adjust Sauce Consistency: If the sauce is too thick, add a splash of water to achieve your desired consistency before tossing it with the chicken. Experiment with Seasoning: Feel free to add additional spices or herbs to the cornstarch mixture for a personalized flavor profile. {{image_4}} You can switch up the protein in this dish. Shrimp is a great choice for a lighter meal. Just coat the shrimp like you do with chicken. Air fry until crispy and golden. Tofu is another option for a vegetarian twist. Use firm tofu, and cut it into bite-sized pieces. The texture will absorb the orange sauce well. Other chicken cuts can work too. Thighs have more flavor and stay juicy. Just adjust the cooking time as thighs may require a bit longer. If you want to change the flavor, try mango or pineapple sauce. These fruits add a sweet twist. Just blend the juice and zest like you do with orange. For a healthier option, use low-sugar or sugar-free sauces. You can find many brands that taste great. This way, you can enjoy the dish without the extra sugar. You can serve these bites in many ways. Wrap them in lettuce for a fun twist. This makes a healthy and crunchy meal. You can also serve them in bowls with rice or quinoa. This turns the dish into a filling main course. They work great as an appetizer too. Just serve with toothpicks for easy eating. Everyone loves a good hand-held snack! To store your Air Fryer Orange Chicken Bites, place them in an airtight container. This keeps them fresh and tasty. Make sure the chicken is fully cooled before sealing. They will last about 3 to 4 days in the fridge. Enjoy them as a quick meal or snack. If you want to freeze them, let the chicken bites cool completely. Arrange them in a single layer on a baking sheet. Freeze until solid, then transfer to a freezer bag. Remove as much air as possible to avoid freezer burn. They can last up to 3 months in the freezer. For reheating, preheat your air fryer to 375°F (190°C). Place the frozen chicken bites in the basket and cook for about 10 minutes. This will help them regain their crispy texture. Leftover orange chicken bites can inspire new meals. Chop them and add to fried rice or salads. You can also stuff them in wraps with fresh veggies. Another idea is to mix them with pasta and a light sauce for a quick dish. Get creative with these bites and enjoy them in different ways! It takes about 12 to 15 minutes to cook your orange chicken bites. Preheat your air fryer to 375°F (190°C) for five minutes. Cook the chicken in a single layer. Shake the basket halfway through for even cooking. When done, the chicken turns golden brown and crispy. Yes, you can marinate the chicken before cooking. A simple marinade adds great flavor. Mix orange juice, soy sauce, and ginger in a bowl. Add the chicken and let it sit for at least 30 minutes. This helps the chicken soak in those tasty flavors. Just remember to coat it in cornstarch afterward. You have many tasty options for dipping sauces. Sweet and sour sauce is popular. You can also try a spicy sriracha sauce for heat. A simple soy sauce mix works well too. If you want something creamy, try a ranch or blue cheese dressing. These sauces will enhance your delicious orange chicken bites. This blog post showed how to make delicious Air Fryer Orange Chicken Bites. You learned about key ingredients like chicken, orange juice, and honey. I provided simple steps for cooking and tips for the best crisp. There are also ways to vary the recipe, storage tips, and answers to common questions. Try making this easy dish. You can impress your family and friends. Enjoy these bites as a tasty meal or snack. Your kitchen adventures will be fulfilling and fun!
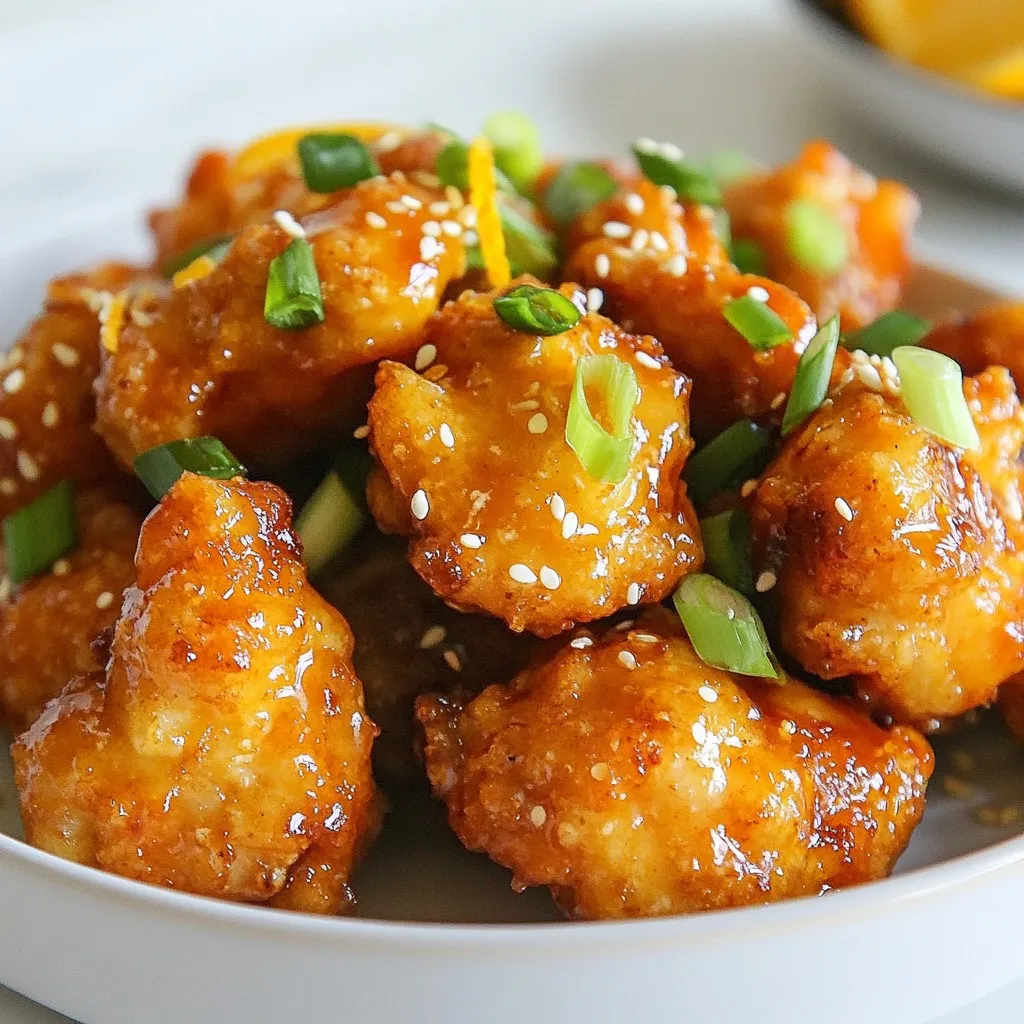
Air Fryer Orange Chicken Bites Flavorful and Easy Meal
Looking for a tasty meal that’s easy to make? Let me introduce you to Air Fryer Orange Chicken Bites! This simple dish combines juicy chicken,
- 4 boneless, skinless chicken breasts - 1 cup fresh pineapple, diced into bite-sized pieces - 1/2 cup packed brown sugar - 1/4 cup soy sauce (low sodium recommended) - 3 cloves garlic, finely minced - 1 tablespoon fresh ginger, grated The main ingredients create the heart of the dish. Chicken breasts provide a nice, tender base. Fresh pineapple adds a sweet and tangy flavor. Brown sugar brings a lovely caramel note. Soy sauce adds depth and saltiness. Garlic and ginger infuse the dish with warmth and spice. - 1 tablespoon sesame oil - 1/2 teaspoon red pepper flakes (optional, for heat) - 1/4 cup green onions, finely chopped (for garnish) These optional ingredients can enhance the dish. Sesame oil adds a nutty richness. Red pepper flakes give a spicy kick. Green onions offer a fresh, vibrant touch. - Use accurate measurements for best taste. This ensures each flavor shines through. - For dietary needs, you can substitute low-sodium soy sauce for regular. You can also switch chicken for tofu. This keeps the dish flavorful and friendly for different diets. {{ingredient_image_2}} To create the marinade, start with a mixing bowl. Add 1/2 cup of packed brown sugar. Then, pour in 1/4 cup of low-sodium soy sauce. Next, add 3 cloves of minced garlic and 1 tablespoon of grated ginger. Don’t forget 1 tablespoon of sesame oil and 1/4 teaspoon of black pepper. If you like some heat, add 1/2 teaspoon of red pepper flakes. Whisk everything together until the brown sugar fully dissolves. This step ensures a smooth and tasty marinade. For marinating, use a resealable plastic bag or a shallow dish. Place your 4 boneless, skinless chicken breasts inside. Pour the marinade over the chicken, making sure it is well coated. Seal the bag tightly or cover the dish with plastic wrap. It’s best to refrigerate the chicken for at least 1 hour. However, for deeper flavor, aim for a marinating time of 3 hours. Before cooking, preheat your grill or grill pan to medium-high heat. This usually takes about 15 minutes. When it is ready, carefully take the chicken out of the marinade. Let any excess marinade drip off. Discard the leftover marinade to keep things safe. Place the chicken on the grill and cook for 6 to 7 minutes on each side. Aim for an internal temperature of 165°F (75°C). This ensures juicy, safe chicken. In the last 2 minutes, add the diced pineapple to the grill. This will caramelize the pineapple and enhance its sweetness. After grilling, remove the chicken and pineapple from the heat. Let the chicken rest for about 5 minutes. This helps the juices stay inside, making it tender. Slice the chicken into strips and arrange them on a platter. Top the chicken with the grilled pineapple pieces. Garnish with finely chopped green onions for a fresh and colorful touch. Enjoy your delicious Brown Sugar Pineapple Chicken! To enhance the flavor of your Brown Sugar Pineapple Chicken, focus on the marinade. The mix of brown sugar, soy sauce, garlic, and ginger creates a sweet and savory taste. You can add zest from a lime or orange for a bright twist. If you want a spicier kick, try adding sriracha or chili sauce. You can also swap soy sauce for coconut aminos for a gluten-free option. For nice grill marks, preheat your grill well. When the grill is hot, place the chicken on it without moving it for a few minutes. This helps create those beautiful lines. To avoid dry chicken, do not overcook it. Use a meat thermometer to check for doneness; the chicken should reach 165°F (75°C). Let it rest after grilling to keep it juicy. Make your dish pop by serving it on a bright platter. Slice the chicken into strips and arrange it neatly. Top it with the caramelized pineapple for a colorful touch. Garnish with green onions for a fresh look. You can also add a sprinkle of sesame seeds for extra flair. This makes the dish not just tasty, but also beautiful for guests. Pro Tips Marinate Longer for Flavor: For the best flavor, aim to marinate the chicken for at least 3 hours or overnight if possible. This allows the flavors to penetrate the meat more deeply. Use a Meat Thermometer: Ensure the chicken is perfectly cooked by using a meat thermometer. It should reach an internal temperature of 165°F (75°C) for safe consumption. Grill Pineapple Separately: If you want to avoid overcooking the chicken, grill the pineapple separately on a lower heat, allowing it to caramelize without compromising the chicken's juiciness. Rest the Chicken: After grilling, let the chicken rest for about 5 minutes before slicing. This helps the juices redistribute, making the chicken more tender and flavorful. {{image_4}} You can easily switch the chicken for turkey. Turkey breast works well and stays juicy. If you want a plant-based option, try tofu. Firm tofu absorbs flavors well. Simply press it to remove extra moisture before marinating. To kick up the heat, add more red pepper flakes. You can also mix in some chili paste for extra spice. If you want less sugar, use less brown sugar or a sugar substitute. You can also use a low-sodium soy sauce to reduce the salt content. Serve this grilled chicken with rice or quinoa for a full meal. A fresh salad pairs nicely too. For sauces, try a sweet teriyaki or a spicy sriracha dip. These will complement the sweet and savory notes of the chicken. To store your Brown Sugar Pineapple Chicken, let it cool first. This helps keep it juicy. Place the chicken in an airtight container. Glass or plastic containers work well. Seal the container tightly. Store it in the fridge for up to three days. If you want to keep it longer, freezing is a great option. When reheating chicken, keep it moist. The best way is to use the oven. Preheat the oven to 350°F (175°C). Place the chicken in a baking dish. Add a splash of water or broth for moisture. Cover with foil to prevent drying out. Heat for about 20 minutes or until hot. Avoid using the microwave if possible. Microwaving can make the chicken rubbery. You can freeze both cooked and uncooked chicken. If you freeze cooked chicken, let it cool completely. Wrap it tightly in plastic wrap, then in foil. This helps prevent freezer burn. For uncooked chicken, place it in a freezer bag. Squeeze out the air before sealing. When ready to use, thaw the chicken in the fridge overnight. Avoid thawing at room temperature to keep it safe. You should marinate the chicken for at least 1 hour. This helps the chicken soak up all the great flavors. However, for the best taste, aim for 3 hours. Longer marinating times can make the chicken even more tender and flavorful. Yes, you can use canned pineapple. Canned pineapple is sweet and easy to use. It saves time and is always ready to go. However, fresh pineapple has a better texture and taste. Fresh pineapple also adds a nice crunch when grilled. If you choose canned, look for ones packed in juice, not syrup. For sides, I suggest the following options: - Steamed rice: It soaks up all the sauce. - Grilled veggies: Bell peppers and zucchini add color and flavor. - Quinoa: A healthy and nutty choice. - Salad: A fresh green salad adds crunch and balance. - Coleslaw: The creaminess pairs well with the sweet chicken. These sides complement the sweet and savory taste of the chicken perfectly! This blog post showed how to make delicious Brown Sugar Pineapple Chicken. We discussed key ingredients, like chicken and pineapple, and how to make a tasty marinade. You learned the right grilling techniques for juicy chicken and creative ways to present your dish. Don’t forget about storage tips to keep leftovers fresh. Enjoy experimenting with variations to suit your taste. Cooking can be simple and fun. Now, it's time to fire up the grill and savor this amazing recipe!
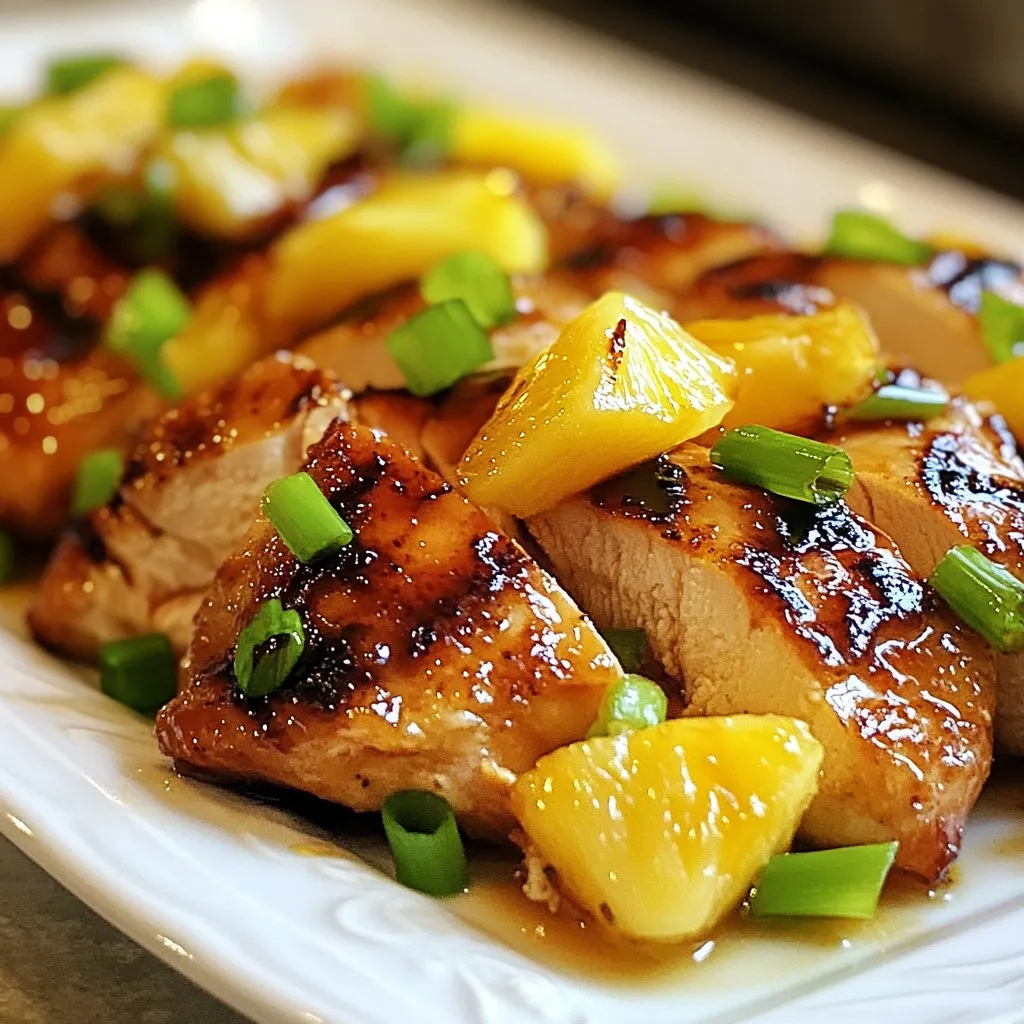
Brown Sugar Pineapple Chicken Flavorful Grilled Dish
Are you ready to elevate your grilling game? Brown Sugar Pineapple Chicken is a sweet and savory dish that stands out at any cookout. Using
- 2 grilled chicken breasts, diced into bite-sized pieces - 1 cup cooked brown rice, cooled - 1 can (15 oz) black beans, rinsed and drained - 1 cup frozen corn, thawed - 1 cup shredded cheddar cheese - 1/2 cup chipotle ranch dressing - 1 ripe avocado, sliced - 1/4 cup fresh cilantro, finely chopped - 4 large flour tortillas (10-inch size recommended) - Lime wedges, for garnish - Salt and freshly ground black pepper to taste Using high-quality ingredients makes a big difference. Fresh chicken gives great flavor. Opt for organic chicken if you can. Choose whole grain brown rice for added nutrition. Look for low-sodium black beans to keep the dish healthy. Fresh corn is best, but frozen works well too. Always use fresh cheddar cheese for a richer taste. If you need a swap, there are options. For a vegetarian burrito, use grilled tofu or tempeh instead of chicken. You can also try quinoa instead of brown rice for a protein boost. If you’re dairy-free, use a vegan cheese. For a gluten-free option, look for gluten-free tortillas. {{ingredient_image_2}} To make Chipotle Ranch Chicken Burritos, gather all your ingredients first. This way, you can work smoothly. You will need grilled chicken, brown rice, black beans, corn, cheese, ranch dressing, avocado, cilantro, and tortillas. This meal is fun, quick, and tasty! 1. Mix the Filling: In a large bowl, combine diced grilled chicken, brown rice, black beans, corn, shredded cheese, and chipotle ranch dressing. Add salt and pepper. Mix well until everything is coated in the dressing. 2. Prepare the Tortillas: Lay out your large flour tortillas on a clean surface. Spoon a good amount of the chicken and rice mixture in the center. Leave about 2 inches of space around the edges. 3. Add Toppings: Place a few slices of avocado on top of the filling. Sprinkle with chopped cilantro for extra flavor. 4. Roll the Burritos: Fold the sides of each tortilla over the filling. Start rolling from the bottom edge to seal in all the deliciousness. 5. Cook the Burritos: Heat a skillet over medium heat. Place the burritos seam-side down in the skillet. Cook for 3-4 minutes on each side until they are crispy and golden. 6. Rest and Serve: Remove the burritos from the skillet and let them rest for a minute. You can slice them in half for easier eating. Serve warm with lime wedges for a zesty touch. - Don’t Overfill: If you add too much filling, it can spill out. Keep it simple. - Crispier Tortillas: Cooking them longer gives a crunchier texture. Just watch closely so they don’t burn. - Fresh Herbs: Always use fresh cilantro for the best taste. You can substitute with parsley if needed. These tips will help you create burritos that are not only delicious but also beautiful. Enjoy your meal prep! You can change the taste of your Chipotle Ranch Chicken Burritos easily. Try adding spices like cumin or paprika. These give a warm flavor that brightens the dish. Want more heat? Add chopped jalapeños or hot sauce. If you love herbs, mix in fresh lime juice or extra cilantro. You can even swap the chipotle ranch dressing for a creamy avocado dressing for a cool twist. Prep your burritos in advance to save time. You can make a big batch and freeze them. Wrap each burrito tightly in foil or plastic wrap. Place them in a freezer bag, and they can last up to three months. When you want one, just heat it in the oven or microwave. This keeps the flavor fresh and the filling warm. Serve your burritos with tasty sides. A fresh salad with lime dressing is a great choice. You can also add tortilla chips with salsa or guacamole. If you want a warm side, try Spanish rice or refried beans. These sides balance well with the burritos and make your meal feel complete. Pro Tips Use Leftovers Wisely: If you have leftover grilled chicken or other ingredients, this recipe is a great way to repurpose them into a delicious meal. Customize Your Filling: Feel free to add other ingredients like bell peppers, onions, or even rice alternatives like quinoa for a unique twist on the burrito. Perfectly Toasted Tortillas: For extra flavor, you can brush the tortillas with olive oil before toasting them in the skillet. Make Ahead: Prepare the filling in advance and store it in the fridge. Assemble and cook the burritos when you’re ready to serve! {{image_4}} You can easily make these burritos vegetarian or vegan. Instead of chicken, use grilled veggies like zucchini, bell peppers, or mushrooms. You can also add extra black beans or chickpeas for protein. For a creamy touch, use a vegan ranch dressing. This keeps the flavor without animal products. If you want to switch up the protein, try ground turkey or beef. You can also use shredded pork for a smoky taste. For a lighter option, grilled shrimp works great. Just cook the protein first, then mix it with the other ingredients. Each option adds its own flavor, making the burrito more fun. To adjust the spice level, you can change the chipotle ranch dressing. For a milder taste, use less dressing or choose a creamy dressing without spice. If you like it hot, add chopped jalapeños or a sprinkle of cayenne pepper to the mix. You control the heat, making it perfect for everyone! To keep your burritos fresh, wrap them tightly in plastic wrap. Place them in an airtight container. You can also use foil for extra protection. Store them in the fridge for up to three days. If you want to keep them longer, freeze the burritos. When you’re ready to eat your burritos, take them out of the fridge or freezer. If frozen, let them thaw in the fridge overnight. To reheat, place the burrito in a skillet over medium heat. Cook for about 5-7 minutes, turning it until heated through. You can also microwave it for 1-2 minutes. Just make sure to cover it with a damp paper towel to keep it from drying out. Grilled chicken lasts about three to four days in the fridge. Cooked brown rice stays good for up to a week. Black beans can last four to five days. Frozen corn keeps well for six months in the freezer. Shredded cheese lasts about a week or two in the fridge. It’s best to check the dates on your packaging to ensure freshness. To make chipotle ranch, blend these ingredients: - 1 cup mayonnaise - 1/2 cup sour cream - 2 tablespoons chipotle peppers in adobo sauce - 1 tablespoon lime juice - Salt to taste. Mix these in a bowl until smooth. Adjust spice by adding more chipotle if needed. This ranch adds a smoky kick to your burritos. If you need a tortilla swap, try these: - Lettuce wraps for a low-carb option - Rice paper for a fresh taste - Pita bread for a unique twist. These options keep your burrito filling while changing the flavor and texture. You can enhance your burrito with these sauces: - Salsa for a fresh, tangy kick - Guacamole for creaminess - Hot sauce for heat. These sauces complement the chipotle ranch, adding layers of flavor to your meal. Yes, you can! Prepare your filling and store it in the fridge for up to three days. Just assemble the burritos when you’re ready to eat. This saves time and keeps meals fresh. Wrap leftover burritos in foil or plastic wrap. Place them in an airtight container. Store in the fridge for up to three days. This keeps them fresh and ready to eat. Absolutely! To freeze, wrap each burrito tightly in plastic wrap and then in foil. They can last up to three months in the freezer. Just thaw in the fridge before reheating. These sides pair nicely with burritos: - Mexican rice for extra carbs - Refried beans for a hearty touch - A fresh salad for crunch. These sides balance the flavors of your burrito meal perfectly. This article covered how to make delicious burritos. We explored key ingredients and quality notes. You learned about healthy substitutions for your needs. I shared step-by-step instructions for cooking them perfectly. We discussed tips for customizing flavors and making burritos ahead of time. By understanding variations like vegetarian options and adjusting spice levels, you can get creative. Storing leftovers properly will help you enjoy them later. Use the FAQs for extra help. Now, you’re ready to make burritos that suit your taste!
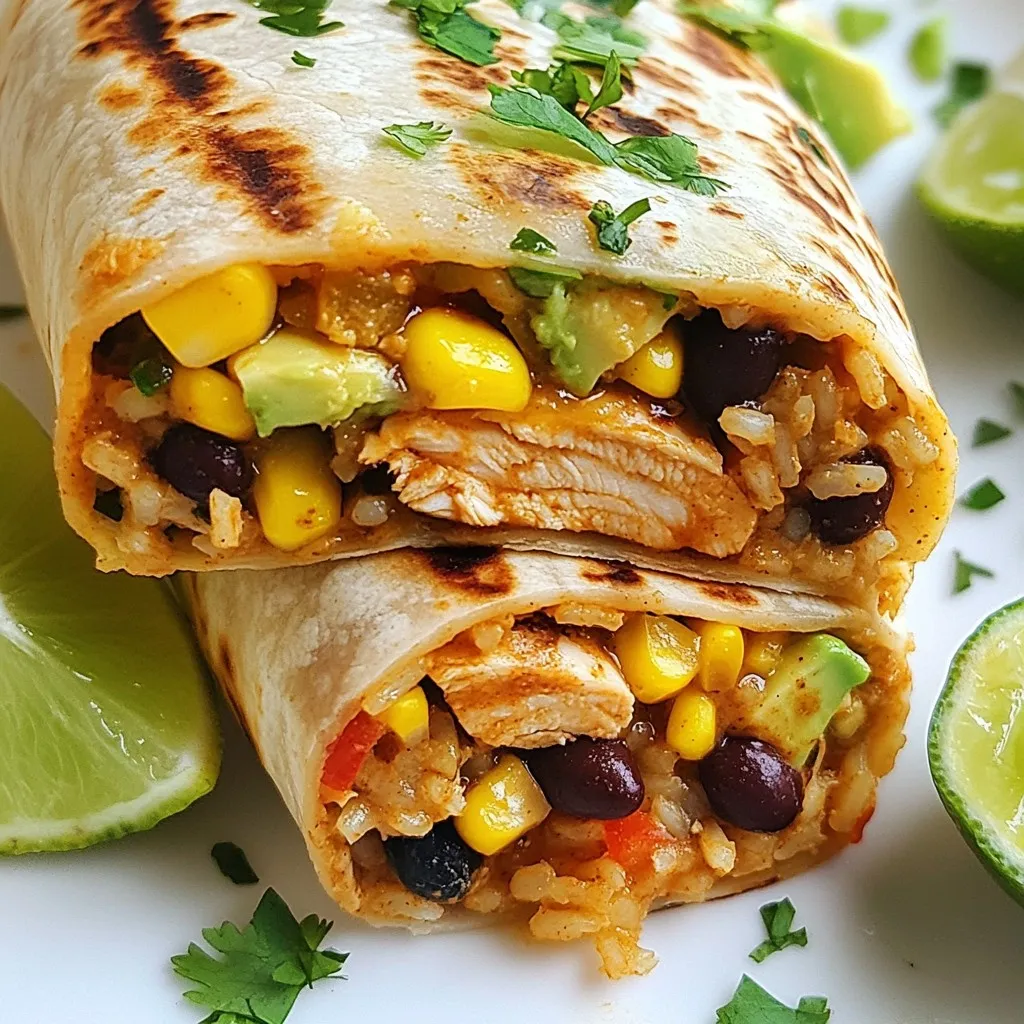
Chipotle Ranch Chicken Burritos Flavorful Meal Prep
Are you ready for a tasty meal that’s easy to prep? Chipotle Ranch Chicken Burritos bring bold flavors to your lunch or dinner. You’ll enjoy
- 1 lb boneless, skinless chicken breasts - 1/2 cup honey - 1/2 cup BBQ sauce - 1 tablespoon soy sauce - 1 teaspoon garlic powder - 1 teaspoon onion powder - 1/2 teaspoon smoked paprika - Salt and pepper to taste - 2 tablespoons olive oil - Fresh parsley for garnish Using these simple ingredients, you can create a delightful dish. The chicken breasts are the star here. They’re easy to work with and super tender. Honey adds sweetness, while BBQ sauce gives depth. Soy sauce adds that nice umami flavor. For seasoning, garlic and onion powder create a rich taste. Smoked paprika adds a little warmth and color. The olive oil helps in cooking the chicken to a golden brown. Lastly, fresh parsley brightens up the dish. It makes the chicken look pretty and fresh. Gathering these ingredients is a breeze. You might already have many in your kitchen. When you combine them, magic happens. Enjoy the process of making these tasty bites! {{ingredient_image_2}} Start by whisking together the honey, BBQ sauce, soy sauce, garlic powder, onion powder, smoked paprika, salt, and pepper in a large mixing bowl. This step is key. It creates a sweet and tangy flavor that sticks to the chicken. Make sure everything blends well. Once mixed, add the bite-sized chicken pieces. Coat them thoroughly in the marinade. Cover the bowl with plastic wrap or a lid. Place it in the refrigerator for at least 30 minutes. If you have time, marinating for up to 2 hours will deepen the flavor. Next, heat a large skillet over medium heat and add the olive oil. Once the oil is hot, add the marinated chicken pieces in a single layer. Sear the chicken for about 3-4 minutes. Turn the pieces occasionally. You want them golden brown on the outside. This step adds a nice texture. After searing, carefully transfer the chicken to a baking sheet. Make sure they are evenly spaced for optimal cooking. Now, preheat your oven to 400°F (200°C). While the oven heats, line the baking sheet with parchment paper. This helps prevent sticking. Once the oven is ready, place the baking sheet inside. Bake the chicken for 15-20 minutes. Check for doneness by using a meat thermometer. The chicken should reach an internal temperature of 165°F (75°C). This ensures your bites are safe to eat. When done, remove the baking sheet from the oven. Drizzle any leftover marinade over the chicken bites. Toss gently to coat them with the delicious sauce. To get the best flavor, marinate your chicken for at least 30 minutes. If you have time, let it sit for up to 2 hours. This will help the chicken soak up all the yummy flavors. If you like spice, you can add more garlic powder or even a pinch of cayenne pepper. Adjust the marinade to fit your taste. When you sear the chicken, use a hot skillet with olive oil. This helps create a golden-brown crust. Sear for about 3-4 minutes, turning the pieces so they cook evenly. After searing, make sure to space the chicken bites out on the baking sheet. This allows the heat to get to each piece, ensuring even cooking. To impress your guests, serve the chicken bites on a colorful platter. Use toothpicks for easy serving. You can add a small bowl of extra BBQ sauce for dipping. For a crunchy side, serve with fresh cucumber slices or carrot sticks. This makes your dish not just tasty but also fun to eat! Pro Tips Marination Time: For the best flavor, allow the chicken to marinate for at least 2 hours. This enhances the taste and tenderness of the chicken. Perfect Searing: Make sure your skillet is hot before adding the chicken. Searing at the right temperature gives a nice golden crust and locks in juices. Check Doneness: Use a meat thermometer to ensure the chicken reaches an internal temperature of 165°F (75°C) for safe consumption. Garnishing: Fresh parsley not only adds color but also a hint of freshness. Feel free to experiment with other herbs like cilantro or chives for a different flavor profile. {{image_4}} You can make your Honey BBQ Chicken Bites even better. One option is to use skinless chicken thighs. They provide more flavor than chicken breasts. Thighs stay juicy and tender, making each bite delicious. Another great swap is replacing honey with maple syrup. Maple syrup gives a unique taste. It pairs well with BBQ sauce and adds a hint of sweetness. This change makes the dish a bit different but still tasty. Want a spicy kick? Try adding hot sauce to the marinade. A few drops can really boost the heat. It balances well with the sweet honey and smoky BBQ flavor. You can also mix in fresh herbs. Adding chopped parsley or cilantro gives a fresh taste. Herbs brighten the dish and add color. They enhance the overall flavor without overwhelming it. You have choices when cooking these bites. Grilling gives a smoky flavor. It creates nice char marks and crispy edges. If you want a more tender bite, baking is great too. Baking keeps the chicken juicy while allowing the sauce to caramelize. For a hands-off option, try a slow cooker. Just add the marinated chicken and let it cook. This method makes the chicken very tender. You can still get great flavor without much effort. To store leftover chicken bites, let them cool first. Place them in an airtight container. This helps keep them fresh and tasty. You can store them in the fridge for up to three days. Use glass or plastic containers with tight lids for the best results. If you want to save the chicken bites for later, freezing is a great option. Make sure they cool down before freezing. Place them in a freezer-safe bag or container. Remove as much air as possible to prevent freezer burn. You can freeze them for up to three months. When you are ready to eat, thaw them in the fridge overnight for the best taste. To reheat chicken bites, the oven is the best choice. Preheat the oven to 350°F (175°C). Spread the chicken bites on a baking sheet in a single layer. Heat them for about 10-15 minutes. This way, they stay crispy. You can also use a microwave, but it may make them a bit soft. If you use the microwave, heat them in short bursts, about 30 seconds at a time, until warm. You should marinate the chicken for at least 30 minutes. This gives the chicken time to soak up the sweet and smoky flavors of the honey BBQ sauce. If you want a deeper flavor, marinate it for up to 2 hours. Just remember, the longer you marinate, the more the flavors blend into the meat. Yes, you can! If you want to switch things up, try using skinless chicken thighs for a richer taste. You can also use fish, like salmon or tilapia. For a plant-based option, tofu works well too. Just cut it into cubes and marinate it the same way. Each option brings a unique twist to the dish. These chicken bites pair nicely with many sides. Try serving them with crispy cucumber slices or colorful carrot sticks for a fresh crunch. You can also add a small bowl of extra BBQ sauce for dipping. For a hearty side, consider fluffy rice or a simple salad. Each choice complements the sweet and smoky flavors beautifully. In this post, we explored the tasty world of Honey BBQ Chicken Bites. We covered main ingredients, from chicken to seasoning, and the importance of marinating. You learned step-by-step cooking techniques and tips for perfecting flavor and presentation. Remember, you can easily customize the recipe to suit your needs. Try grilling or adding extra herbs for a new twist. Enjoy your cooking journey, and make these bites a hit at your next meal!
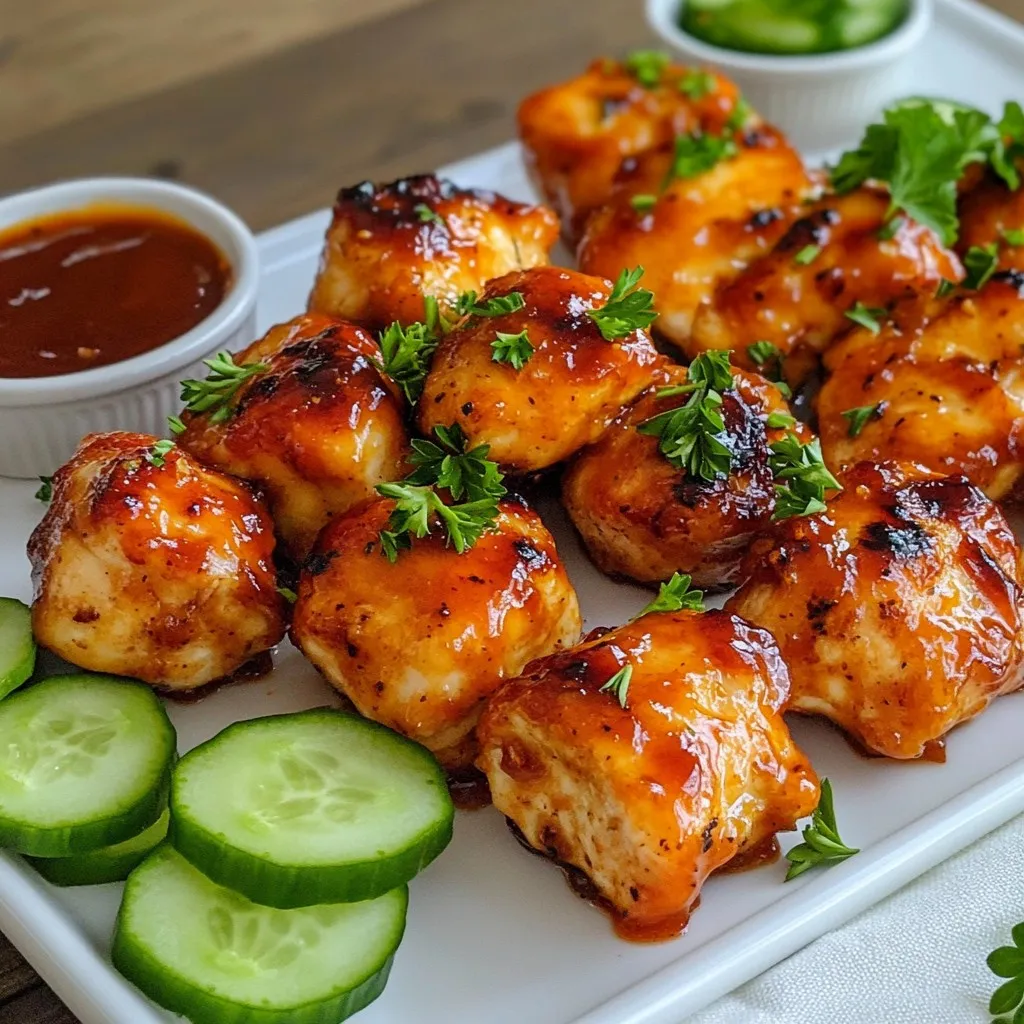
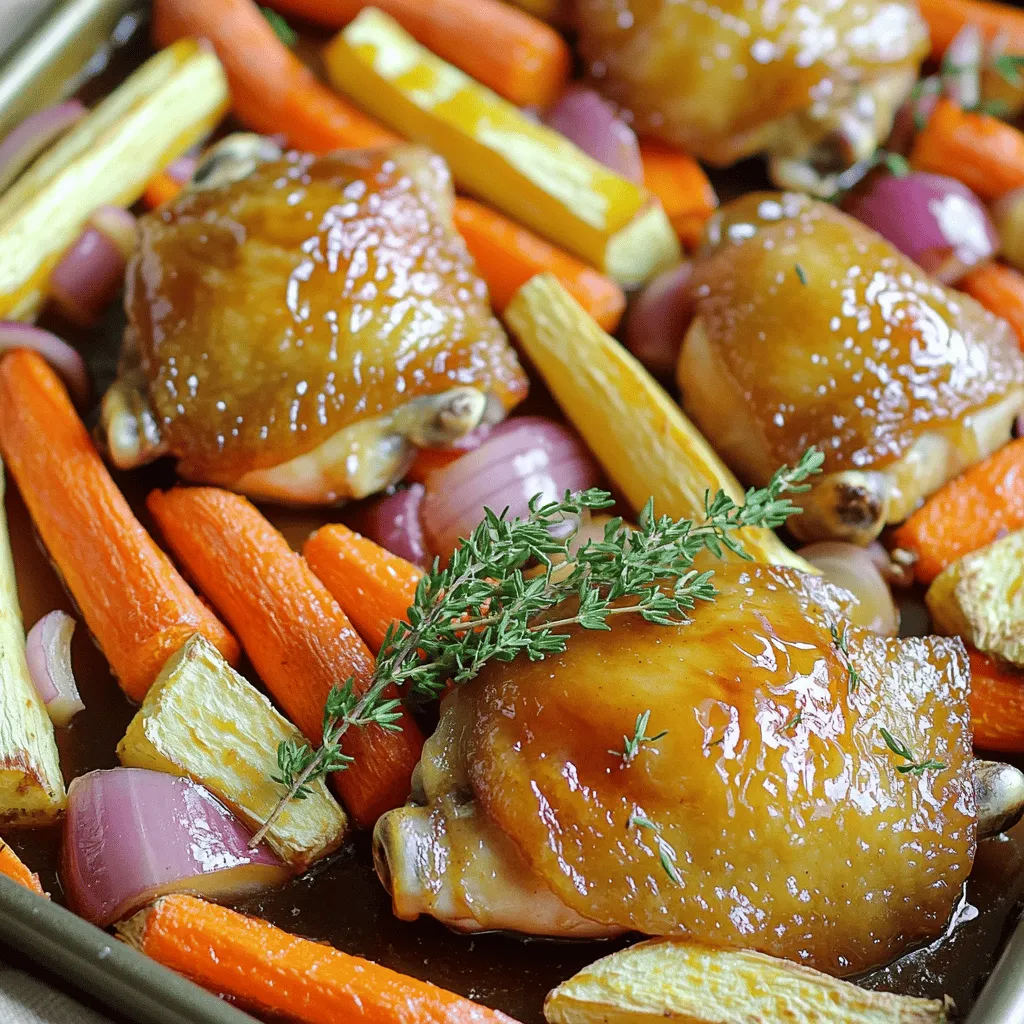
Honey BBQ Chicken Bites Flavorful and Simple Recipe
If you’re craving a delicious and easy meal, you’ll love my Honey BBQ Chicken Bites! This simple recipe transforms basic chicken into a flavorful dish
To make Cheddar Garlic Herb Potato Soup, you need: - 4 medium russet potatoes, peeled and diced into uniform cubes - 1 medium onion, finely chopped - 3 cloves garlic, minced - 4 cups vegetable broth (preferably low-sodium) - 1 cup heavy cream (or substitute with half-and-half for a lighter option) - 2 cups shredded sharp cheddar cheese, plus extra for garnish - 1 teaspoon dried thyme - 1 teaspoon dried rosemary - 2 tablespoons extra-virgin olive oil - Salt and freshly ground black pepper to taste - Fresh chives, finely chopped (for garnish) You can easily make this soup fit different diets. For a dairy-free option, use: - Coconut cream or cashew cream in place of heavy cream. - Nutritional yeast can add a cheesy flavor without dairy. For a lower-fat version, try: - Half-and-half instead of heavy cream. - Use a low-fat cheese to cut back on calories. Fresh herbs can bring a bright taste to this soup. Here are some great options: - Fresh thyme adds a nice earthiness. - Fresh rosemary gives a strong flavor. - Fresh parsley can lighten and freshen the soup. Feel free to mix and match these herbs based on what you love! {{ingredient_image_2}} For this soup, you need to prepare your ingredients first. Gather the following: - 4 medium russet potatoes, peeled and diced into uniform cubes - 1 medium onion, finely chopped - 3 cloves garlic, minced - 4 cups vegetable broth (preferably low-sodium) - 1 cup heavy cream (or substitute with half-and-half for a lighter option) - 2 cups shredded sharp cheddar cheese, plus extra for garnish - 1 teaspoon dried thyme - 1 teaspoon dried rosemary - 2 tablespoons extra-virgin olive oil - Salt and freshly ground black pepper to taste - Fresh chives, finely chopped (for garnish) Make sure to chop everything before you start cooking. This makes the process smooth and quick. In a large pot, heat the olive oil over medium heat. When the oil shimmers, add the chopped onion. Cook it for about 5 minutes until soft and translucent. Stir occasionally so it doesn’t stick. Next, add the minced garlic to the pot. Sauté for 1-2 minutes until it smells great. Be careful not to burn the garlic. This can ruin the flavor. Now, add the diced potatoes and stir well. Let them cook for 2-3 minutes. This helps coat the potatoes with the onion and garlic flavors. Pour in the vegetable broth, making sure the potatoes are fully covered. Increase the heat and bring it to a boil. Then reduce the heat to a gentle simmer. Cover the pot and cook until the potatoes are tender, about 15-20 minutes. Once the potatoes are fork-tender, use an immersion blender to puree the soup until it’s silky smooth. If you don’t have an immersion blender, you can carefully transfer the soup to a traditional blender in batches. Just be cautious with the hot liquid. Return the pot to low heat. Stir in the heavy cream. Gradually add the shredded cheddar cheese, mixing until melted and creamy. Season the soup with dried thyme, dried rosemary, and salt and pepper to taste. Let it simmer for another 5 minutes. This allows all the flavors to blend together beautifully. When ready to serve, ladle the hot soup into bowls. Garnish with chopped fresh chives and an extra sprinkle of cheddar cheese if you like. Enjoy! To get a smooth and creamy texture, blend the soup well. Use an immersion blender for ease. If you don’t have one, transfer the soup to a regular blender in small batches. Make sure not to fill it too full, as hot soup can splash. Add heavy cream slowly while stirring. This helps the cream mix in well and keeps it rich. One common mistake is overcooking the garlic. It can become bitter if burnt. Also, don’t skip the blending step. Leaving chunks can make the soup feel less creamy. Make sure the potatoes are fork-tender before blending. Lastly, be cautious with salt. Taste as you go, since the broth can add saltiness. Serve the soup hot in bowls. Top it with extra cheddar cheese and fresh chives for color. For an added treat, pair it with warm crusty bread. This makes for a perfect dip! You can also serve it with a light salad for a complete meal. Enjoy every spoonful! Pro Tips Use Fresh Ingredients: Fresh herbs and high-quality cheese will elevate the flavor of your soup significantly. Opt for fresh chives and sharp cheddar for the best taste. Control the Thickness: If you prefer a thicker soup, blend less of the potato mixture. For a thinner consistency, add more vegetable broth until your desired texture is achieved. Enhance Flavor with Toppings: Consider adding crispy bacon bits, a dollop of sour cream, or a drizzle of truffle oil as toppings to add extra flavor and texture contrast. Make It Ahead: This soup can be made ahead of time and stored in the refrigerator for up to 3 days. Reheat gently on the stove, adding a splash of broth if needed to restore creaminess. {{image_4}} You can make cheddar garlic herb potato soup even heartier by adding protein. Bacon adds a crispy, smoky flavor. Simply cook the bacon first, then remove it and chop it. Mix it into the soup right before serving. For chicken, cook and shred a rotisserie chicken. Stir it in after blending the soup. This makes every bite more filling. Feel free to get creative with your veggies! Adding carrots or celery can boost flavor and texture. Dice them small and sauté with the onion at the start. You can also use broccoli or spinach. Add these greens just before blending. They add color and nutrients, making your soup even better. If you like heat, try adding red pepper flakes. A pinch goes a long way! Mix it in while you cook the soup. You can adjust the spice to match your taste. For an extra kick, add sliced jalapeños or a dash of hot sauce. This gives your soup a bold twist that is sure to impress. To keep your Cheddar Garlic Herb Potato Soup fresh, let it cool first. Once cooled, transfer it to an airtight container. Store it in the fridge for up to three days. Make sure to label the container with the date. This way, you’ll know when to use it by. When you’re ready to enjoy leftovers, pour the soup into a pot. Heat it over medium heat, stirring often. You want it hot, not boiling. If the soup seems thick, add a splash of broth or water. Stir until smooth and warm. You can freeze this soup for up to three months. Use freezer-safe containers or bags. Leave some space at the top for expansion. To thaw, place it in the fridge overnight. Reheat as described above when you’re ready to serve. Enjoy the comfort of this hearty soup any time! Yes, you can use sweet potatoes! They will change the soup's flavor and color. Sweet potatoes add a natural sweetness and creamy texture. When using them, keep the cooking time similar. Make sure to peel and dice them like the russets. Your soup will still be hearty and tasty. Making this soup gluten-free is easy. The main ingredient to check is the vegetable broth. Look for a low-sodium broth that is labeled gluten-free. Most vegetable broths are safe, but always read labels. All other ingredients in the recipe are naturally gluten-free. This means you can enjoy the soup without worry. If you want a lighter option, half-and-half works well. You can also use coconut milk for a dairy-free choice. Almond milk or cashew cream can add creaminess too. Each option will slightly change the flavor, but all will keep the soup delicious. Adjust the amount to reach your desired creaminess. This blog post guided you through making a delicious soup. We covered ingredients, cooking steps, and tips for the best texture. You learned how to add protein and spices for variety. Plus, I shared storage tips to keep your leftovers fresh. Remember, making soup is fun and flexible. Don't be scared to try new things. Enjoy your cooking journey, and make it your own!
Cheddar Garlic Herb Potato Soup Hearty and Flavorful
Looking for a warm hug in a bowl? My Cheddar Garlic Herb Potato Soup is hearty and flavorful, perfect for chilly days. With simple ingredients
- 2 lbs chicken breast, diced into bite-sized pieces - 1 cup teriyaki sauce (either store-bought or homemade) - 2 tablespoons olive oil - 4 cups fresh broccoli florets - 2 cups brown rice (uncooked) - 1 red bell pepper, thinly sliced - 2 carrots, julienned - 1 tablespoon sesame seeds - 2 green onions, finely sliced - Salt and black pepper to taste - Homemade teriyaki sauce - Additional vegetables For these teriyaki chicken bowls, the main ingredients bring a lot of flavor. The chicken breast serves as the protein. Teriyaki sauce adds a sweet and savory touch. Olive oil helps cook the chicken to a perfect golden brown. Fresh broccoli, red bell pepper, and carrots add color and crunch. Brown rice is your base, giving you healthy carbs. Garnishing with sesame seeds and green onions adds extra flavor. A pinch of salt and pepper enhances everything. You can also make your own teriyaki sauce if you like. Feel free to add other veggies, too! Peas or snap peas work well. By choosing fresh ingredients, you ensure the best taste. Meal prep does not have to be boring. With these colorful ingredients, your bowls will look great and taste even better! {{ingredient_image_2}} - Rinsing the Rice Start by rinsing the brown rice under cold water. This helps to remove excess starch. Keep rinsing until the water runs clear. - Boiling and Simmering In a medium pot, mix the rinsed rice with 4 cups of water. Add a pinch of salt. Bring this to a boil over high heat. Once boiling, reduce the heat to low. Cover the pot and let it simmer for about 40-45 minutes. Check when the rice is tender. After it's done, fluff it with a fork and set it aside to cool. - Searing the Chicken Heat olive oil in a large skillet on medium-high heat. When the oil shimmers, add the diced chicken breast. - Seasoning with Salt and Pepper Season the chicken with salt and black pepper. Cook the chicken for 7-10 minutes. Stir occasionally until it is golden brown and fully cooked. - Pouring and Simmering Once the chicken is cooked, pour the teriyaki sauce over it. Stir well to coat all the chicken pieces. Allow this to simmer for 2-3 minutes. This helps the sauce thicken and stick to the chicken. - Heating Oil and Adding Vegetables In another pan, heat a bit more olive oil if needed. Add the broccoli florets, sliced red bell pepper, and julienned carrots. - Cooking Time and Texture Cook these vegetables over medium heat for about 5-7 minutes. Stir occasionally until the colors brighten and they become slightly tender but still crisp. - Layering Ingredients For meal prep, take your containers or bowls. Start with the cooked brown rice at the bottom. - Ensuring Even Distribution Top each serving with the teriyaki chicken. Add a generous helping of the sautéed vegetables on top. This creates a colorful and tasty meal. - Adding Sesame Seeds and Green Onions Finish each bowl by sprinkling sesame seeds and adding sliced green onions on top. This adds crunch and flavor. - Cooling and Storing Tips Let the bowls cool completely at room temperature. Once cool, seal them with lids. Store them in the fridge for up to 5 days. - Cooking in Batches I love cooking in batches to save time. Cook enough rice and chicken for several meals. This way, you won't have to repeat the cooking process daily. You can also prepare extra veggies to keep things fresh. - Organizing Ingredients Keep your workspace tidy. Lay out all ingredients before you start. Having everything ready helps you move quickly and stay focused. Use clear containers to store chopped veggies. This keeps them fresh and easy to grab. - Avoiding Overcooking To keep your chicken juicy, avoid overcooking. Cook it just until golden brown. It should reach an internal temperature of 165°F. This ensures safety and great taste without dryness. - Choosing the Right Sauce For the best flavor, choose a good teriyaki sauce. You can use store-bought or make your own. If you make it, balance the sweet and salty for a perfect taste. A great sauce makes the chicken shine. - Pairing with Other Foods Teriyaki chicken bowls are great with many sides. Try adding edamame or snap peas for crunch. You can also serve it with a side salad for freshness. Mixing textures makes each bite exciting. - Customizing Each Bowl Personalize each bowl to your taste. Add more veggies or swap the rice for quinoa. You can even sprinkle on some chili flakes for heat. Make it your own! Pro Tips Marinate for More Flavor: For an extra depth of flavor, consider marinating the diced chicken in teriyaki sauce for at least 30 minutes before cooking. This will infuse the chicken with the sauce's rich taste. Use Fresh Vegetables: Using fresh, seasonal vegetables not only enhances the flavor but also adds vibrant colors to your dish. Feel free to swap in your favorites like snap peas or bell peppers for a personal touch. Batch Cook Rice: Cook a larger batch of brown rice at once and store extras in the fridge or freezer. This makes meal prep easier and allows you to whip up these bowls even faster in the future. Garnish for Presentation: Don't skip the garnishes! Sesame seeds and sliced green onions not only add flavor but also give your meal a professional presentation, making it more appealing. {{image_4}} You can swap chicken for tofu or tempeh. Both options are great for plant-based diets. Tofu absorbs flavors well, making it a tasty choice. Tempeh has a nutty taste and adds texture. If you prefer beef or pork, feel free to use those. Thinly slice beef or pork and adjust cooking times. Cook them until they reach a safe temperature. Both options can pair nicely with teriyaki sauce. Mixing vegetables can add fun to your meal prep. Use seasonal veggies like snap peas or bell peppers. Carrots and broccoli are classic, but don't stop there. Try zucchini or asparagus for a new twist. You can also mix and match vegetables based on your mood. Add green beans for crunch or roasted sweet potatoes for sweetness. This flexibility keeps the meals interesting all week. If you want to kick up the flavor, add spices or heat. A pinch of red pepper flakes gives a nice kick. Fresh garlic or ginger can also boost the taste. Don’t hesitate to use different sauces! Swap teriyaki for a sweet chili sauce or soy sauce. Each option brings a unique flavor to your bowls. Experiment and find your favorite combo! - Duration of Freshness: Your meal prep teriyaki chicken bowls stay fresh for up to 5 days in the fridge. - Best Containers for Storage: Use airtight glass or plastic containers. These help keep your food fresh and prevent spills. - Freezing Portions: If you want to store them longer, freeze individual servings. This makes it easy to grab a meal on busy days. - Thawing Instructions: To thaw, place the bowl in the fridge overnight. You can also use the microwave for a quick thaw. - Best Methods for Reheating: The microwave is quick and easy. You can also use a skillet over low heat for better texture. - Maintaining Texture and Flavor: Add a splash of water when reheating in the microwave. This helps prevent the chicken from drying out. You can store these bowls in the fridge for up to five days. Make sure to seal them tightly. Yes, leftover chicken works great! Just chop it into bite-sized pieces. It saves time and reduces waste. Homemade teriyaki sauce often tastes fresher and can be customized. You control the flavors and ingredients. You can use extra sauce for stir-fries, marinades, or as a dipping sauce. It adds flavor to many dishes. Yes, you can freeze these bowls! Just ensure they cool completely before sealing. They last up to three months in the freezer. You've learned how to make delicious teriyaki chicken bowls using simple steps. We covered main ingredients, cooking techniques, and tips for perfect results. You can also customize your dish with different proteins and veggies. Remember, meal prep helps save time and makes healthy eating easy. Choose your favorites and enjoy a tasty and flexible meal. With these tools, you can create something great every time. Happy cooking!
Meal Prep Teriyaki Chicken Bowls Packed with Flavor
Ready to spice up your week with meal prep? These Meal Prep Teriyaki Chicken Bowls are packed with flavor and will keep your taste buds
- 1.5 pounds boneless, skinless chicken breasts, sliced into thin strips - 1 red bell pepper, sliced into thin strips - 1 yellow bell pepper, sliced into thin strips - 1 green bell pepper, sliced into thin strips - 1 large red onion, sliced into thin wedges - 4-6 small flour or corn tortillas The main ingredients for sheet pan chicken fajitas make this dish bright and colorful. The chicken gives protein, while the bell peppers add sweetness and crunch. The onion adds a sharp flavor that balances well with the spices. - 3 tablespoons olive oil - 2 teaspoons chili powder - 1 teaspoon ground cumin - 1 teaspoon smoked paprika - 1/2 teaspoon salt - 1/2 teaspoon black pepper The seasoning ingredients are key to great flavor. Olive oil helps the spices stick and adds richness. Chili powder brings heat, while cumin and smoked paprika add depth. Salt and pepper enhance all the other flavors. - Fresh cilantro - Sliced avocado - Lime wedges - Sour cream - Shredded cheese Optional toppings let you customize your fajitas. Fresh cilantro adds a burst of freshness. Sliced avocado gives creamy texture. Lime juice brightens the dish. Sour cream and shredded cheese add richness and flavor with every bite. {{ingredient_image_2}} Start by preheating your oven to 425°F (220°C). This high temperature helps the chicken and veggies cook evenly. An even cook means better flavor and texture. Next, slice your chicken and veggies. Use a sharp knife for clean cuts. I prefer to cut the chicken into thin strips for quick cooking. For the peppers and onion, aim for thin strips and wedges. This helps them cook at the same rate. A cutting board is a must for safety and stability. In a small bowl, whisk together olive oil, chili powder, ground cumin, smoked paprika, salt, and black pepper. This mix brings great flavor to your dish. Pour this seasoning over the chicken and veggies in a large bowl. Use your hands or a spatula to mix everything well. Make sure every piece is coated in those tasty spices. Line a sheet pan with parchment paper. This makes cleaning up a breeze. Spread out the chicken and veggie mix in a single layer. Avoid overcrowding them. This allows everything to roast properly and get that nice char. Place the pan in your preheated oven. Bake for 20-25 minutes. Stir halfway through for even cooking. You want the chicken to reach 165°F (74°C) for safety. The veggies should be tender and slightly caramelized. While your fajitas bake, warm the tortillas. You can use a dry skillet over medium heat. Heat them for about 30 seconds on each side. Alternatively, wrap them in aluminum foil and place them in the oven for the last 5 minutes of cooking. This keeps them soft and ready to fill. To make your fajitas burst with flavor, try marinating the chicken. Mix olive oil, chili powder, cumin, and paprika in a bowl. Let the chicken sit in this mix for at least 30 minutes. This adds depth and richness to each bite. If you want more spice, add more chili powder or a pinch of cayenne. Start small, so you can control the heat. Use a meat thermometer to check chicken. The safe internal temperature is 165°F (74°C). This ensures juicy chicken without dryness. To avoid overcooking, stir the pan halfway through. This helps the chicken cook evenly with the veggies. Using parchment paper makes cleanup a breeze. It prevents sticking and holds in flavors. Just line your pan before adding the chicken and veggies. For even easier prep, cut the veggies ahead of time. Store them in the fridge until you're ready to cook. This saves time and makes cooking fun! Pro Tips Marinate for More Flavor: If time allows, marinate the chicken in the seasoning mixture for at least 30 minutes or overnight. This will enhance the depth of flavor in your fajitas. Use Fresh Ingredients: Opt for fresh vegetables and herbs whenever possible. Fresh produce adds brightness and flavor to your dish, making it even more enjoyable. Customize Your Veggies: Feel free to swap in other vegetables like zucchini, mushrooms, or corn for a different twist. This allows you to use what you have on hand or experiment with flavors. Keep It Warm: To keep your tortillas warm while preparing the fajitas, wrap them in a clean kitchen towel and place them in a basket. This will ensure they stay soft and pliable for wrapping. {{image_4}} You can switch the chicken for beef or shrimp. Both options add a new taste. For beef, use flank steak, sliced thinly. For shrimp, choose medium to large shrimp, peeled and deveined. Both proteins cook well on the sheet pan. If you want a vegetarian dish, use hearty vegetables like mushrooms or zucchini. You can even add chickpeas for protein. Changing spices can alter the whole dish. Try adding cayenne for heat or oregano for a fresh taste. You can also mix in fruits like pineapple or mango for sweetness. These fruits add a nice contrast to the spices. Just chop them small and mix them with the chicken and veggies for roasting. You can choose flour or corn tortillas. Flour tortillas are soft and chewy, while corn tortillas are more robust and have a slight crunch. If you want low-carb options, try lettuce wraps or almond flour tortillas. Both choices keep the meal light and fresh while still being filling. Store leftover chicken fajitas in the fridge. Use airtight containers to keep them fresh. Make sure to cool the fajitas before sealing. They will stay good for about 3-4 days. For freezing, place cooled fajitas in a freezer-safe bag. Remove as much air as possible. This helps prevent freezer burn. To reheat, thaw overnight in the fridge. Then, warm them in the oven or microwave until heated through. Chicken fajitas are best when fresh, but they can last. In the fridge, they stay good for about 3-4 days. When frozen, they can last up to 2-3 months. Signs of spoilage include a bad smell or change in color. If you see these, it's best to toss them out. You can add heat with a few simple changes. Try using: - 1 teaspoon cayenne pepper - 1-2 jalapeños, sliced - Hot sauce to taste These additions boost the spice level. Adjust to your taste! Yes, you can make this dish ahead of time. Here are some tips: - Slice the chicken and veggies the night before. - Store them in an airtight container in the fridge. - Mix the spices and keep them separate until cooking. This makes assembly quick and easy! Many sides complement fajitas perfectly. Consider these: - Mexican rice - Refried beans - Guacamole - A fresh salad These sides enhance your meal and add variety. Definitely! Here are some alternatives: - Grilling: Marinate and grill the chicken and veggies for a smoky flavor. - Stovetop: Sauté everything in a skillet over medium-high heat until cooked through. Both methods offer great taste and texture! You can create delicious sheet pan chicken fajitas using simple ingredients like chicken, veggies, and tortillas. I covered everything from preparation to cooking tips. Remember, adjusting spices and toppings can elevate your dish. Store leftovers properly to maintain freshness. Don't hesitate to experiment with different proteins and flavors. Enjoy making these easy, tasty fajitas that everyone will love!
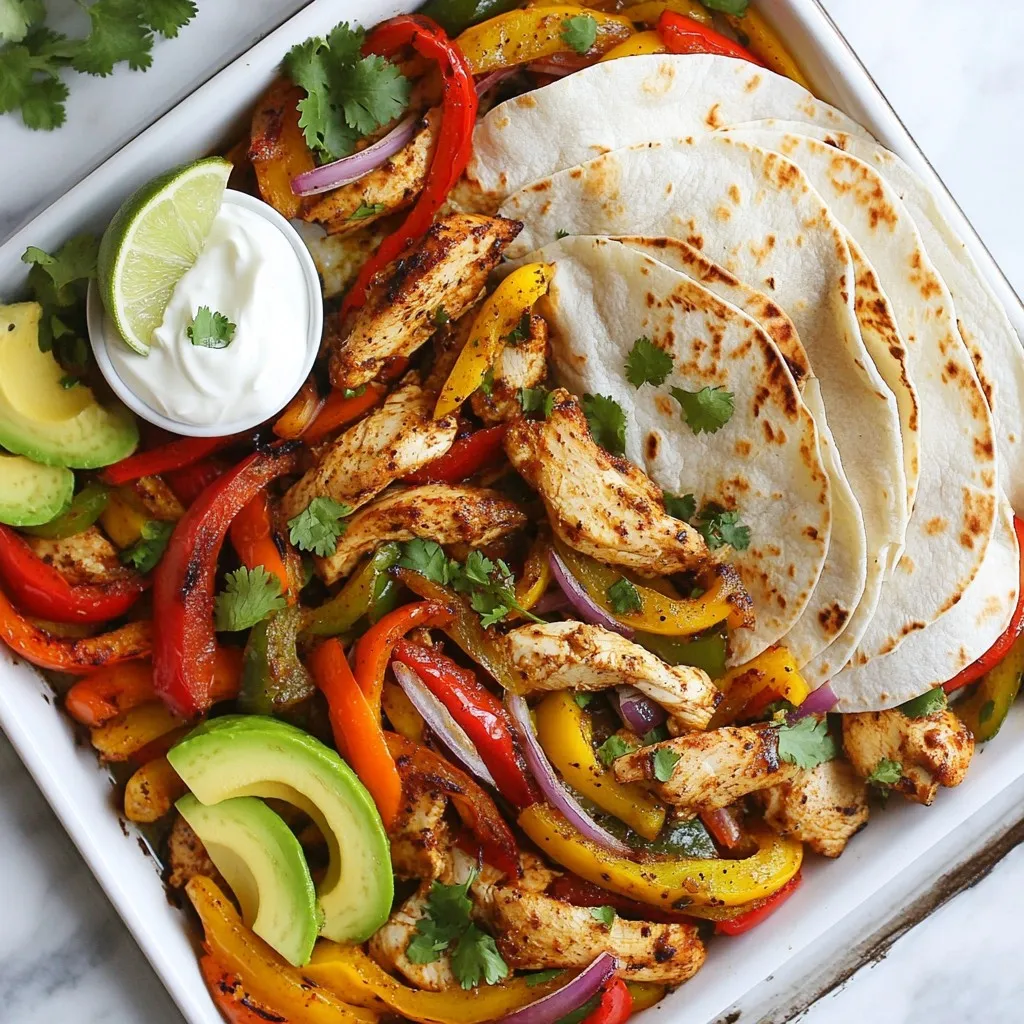
Sheet Pan Chicken Fajitas Flavorful and Easy Dinner
Looking for a quick dinner idea that packs a punch of flavor? Try my Sheet Pan Chicken Fajitas! This easy meal takes just a few
- 8 oz linguine or spaghetti - 1 lb shrimp, peeled and deveined - 2 tablespoons Cajun seasoning - 2 tablespoons olive oil - 3 cloves garlic, minced - 1 cup cherry tomatoes, halved - 1 cup heavy cream - 1/2 cup grated Parmesan cheese - Salt and freshly ground black pepper to taste - Fresh parsley, chopped (for garnish) When it comes to shrimp, freshness is key. Here are some tips to help you choose the best shrimp: - Look for firmness: Fresh shrimp should feel firm to the touch. If they feel mushy, skip them. - Check the color: Fresh shrimp have a translucent look. Avoid any shrimp that appear dull or discolored. - Smell matters: Fresh shrimp have a clean, light ocean smell. Any strong fishy odor is a red flag. - Buy from trusted sources: Go to a reputable fish market or grocery store. Ask the fishmonger about the shrimp's source. - Know your types: If you can, choose wild-caught shrimp for better flavor and sustainability. Cajun seasoning adds a unique kick to your pasta. You can choose between homemade or store-bought options. Here’s how they compare: - Homemade seasoning: Making your own gives you control over flavors. Combine paprika, cayenne, garlic powder, onion powder, oregano, thyme, and black pepper. Adjust the spices to fit your taste. - Store-bought seasoning: This option is quick and easy. Just read the label to check for added fillers or preservatives. Look for brands that use natural ingredients for the best flavor. Choosing between the two depends on your time and preference. I love making my own when I can, but store-bought is great for a quick meal. {{ingredient_image_2}} To start, boil a large pot of water. Add a pinch of salt to the water. This step helps season the pasta as it cooks. - Use 8 oz of linguine or spaghetti. - Cook according to the package instructions. This usually takes about 8-10 minutes. - You want the pasta to be al dente, which means it should still have a slight bite. - Once done, drain the pasta. Remember to save a bit of the pasta water. It can help adjust your sauce later. Now, let’s focus on the shrimp. You need 1 lb of peeled and deveined shrimp. - In a bowl, toss the shrimp with 2 tablespoons of Cajun seasoning. Make sure every shrimp gets a nice coat of spice. - Next, heat 2 tablespoons of olive oil in a skillet over medium-high heat. - Once the oil is hot, add the shrimp in a single layer. Cook for about 2 minutes on each side. They should turn pink and opaque when done. - After cooking, take the shrimp out of the skillet and place them on a plate. In the same skillet, we’ll make a creamy sauce. This is where all the magic happens! - First, add 3 cloves of minced garlic to the hot skillet. Sauté it for about 30 seconds. You want it fragrant but not burnt. - Then, toss in 1 cup of halved cherry tomatoes. Cook for 2-3 minutes, letting them soften and release their juices. - Now, it's time for the heavy cream! Pour in 1 cup and stir it gently with the tomatoes. - Let this mixture simmer. Gradually add in 1/2 cup of grated Parmesan cheese. Stir until it melts and the sauce is smooth. - Season with salt and freshly ground black pepper to your taste. Now, this sauce will bring all your flavors together! To change the spice in your Minute Cajun Shrimp Pasta, use more or less Cajun seasoning. You can start with one tablespoon. Mix it with the shrimp and taste. If you want more heat, add more seasoning. If it’s too spicy, balance it with a bit of cream. This way, you control the flavor. For this recipe, you need a few key tools: - A large pot for boiling pasta - A large skillet for cooking shrimp and sauce - A mixing bowl for seasoning shrimp - A spatula for stirring These tools help you cook the meal quickly and easily. To keep shrimp tender, cook them just until pink and opaque. This usually takes about 2 minutes on each side. If you leave them too long, they get tough. Always keep an eye on your shrimp while they cook. If you’re unsure, take one out and check. Cooked shrimp should curl slightly but remain firm. Pro Tips Perfect Pasta: Always cook your pasta al dente for the best texture. It should have a slight bite to it, which will also help absorb the sauce better. Fresh Shrimp: Use fresh shrimp if possible for the best flavor. If using frozen, make sure to thaw them completely before seasoning. Adjusting Creaminess: If your sauce is too thick, add a splash of the reserved pasta water gradually until you achieve your desired consistency. Flavor Boost: For an extra kick, consider adding a splash of hot sauce or a pinch of cayenne pepper to the sauce before serving. {{image_4}} You can switch up the pasta to fit your taste. While I love linguine, you can try: - Spaghetti: A classic choice that works well. - Fettuccine: For a wider noodle option. - Zucchini Noodles: Perfect for a low-carb meal. - Whole Wheat Pasta: Adds fiber and a nutty flavor. Each pasta will soak up the sauce differently, giving you a unique dish every time. Boost the health factor by adding veggies. Here are some great options: - Spinach: Toss it in at the end until wilted. - Bell Peppers: Slice them thin and sauté with the garlic. - Broccoli: Steam it and mix it in for crunch. - Mushrooms: Sauté them with the shrimp for earthy flavor. These veggies not only add nutrients but also make the dish more colorful. If you want a lighter meal, try these swaps: - Light Cream: Use it instead of heavy cream for fewer calories. - Shrimp Alternatives: Chicken or tofu can replace shrimp. - Low-Fat Cheese: Substitute with a reduced-fat Parmesan. - Whole Wheat Pasta: It’s more filling and healthier. These swaps keep the flavors while making the dish lighter on the waistline. To store leftovers of your Minute Cajun Shrimp Pasta, let it cool to room temperature. Then, transfer it to an airtight container. This will keep your pasta fresh for up to three days in the fridge. Make sure to seal the container tightly. This way, it won't absorb other smells from your fridge. When you are ready to enjoy your leftovers, reheat the pasta gently. You can use a skillet on low heat. Add a splash of water or cream to keep it moist. Stir often to avoid burning. You can also microwave it in short bursts, stirring in between. This helps the pasta heat evenly. If you want to keep your pasta longer, freezing is a great option. Place the cooled pasta in a freezer-safe container or bag. Make sure to remove as much air as possible. It will stay good for about two months. When you’re ready to eat, thaw it in the fridge overnight before reheating. Yes, you can use frozen shrimp. Just remember to thaw them first. Simply place the shrimp in a bowl of cold water for about 10-15 minutes. This way, they will cook evenly. To make Cajun shrimp pasta gluten-free, use gluten-free pasta. Look for options made from rice or quinoa. These alternatives cook well and taste great. You can pair this dish with a fresh salad. A simple green salad with a lemon vinaigrette works well. Garlic bread is another great side. It adds a nice crunch and flavor. This blog post explored making a delicious Cajun shrimp pasta dish. We covered key ingredients, from selecting fresh shrimp to seasoning tips. I provided step-by-step instructions for cooking pasta and shrimp perfectly. You learned ways to adjust spice levels and the best cooking tools. We also discussed variations for different tastes and storage methods to keep leftovers fresh. Finally, I answered common questions about using frozen shrimp and gluten-free options. Enjoy cooking this dish and impressing your friends with your culinary skills!
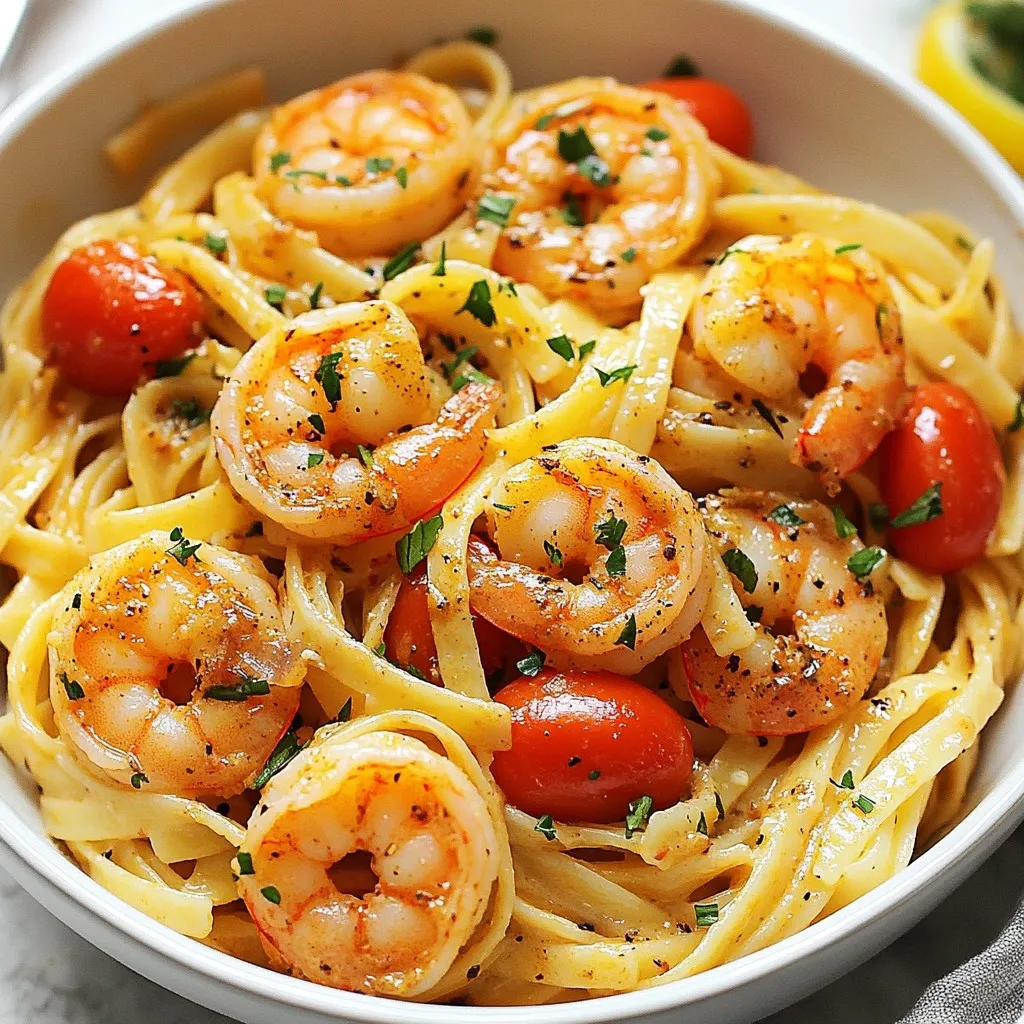
Minute Cajun Shrimp Pasta Quick and Easy Recipe
Are you ready to spice up your dinner routine? My Minute Cajun Shrimp Pasta recipe is here to save the day! This dish is quick,